SimpTrack 3 Camera Setup & Firmware Update Guide
We have both HuddleCamHD-branded SimplTrack 3 and PTZOptics SimplTrack 3 cameras. This guide applies to either of them.
This guide uses the Windows-only software to set up your camera and update its firmware.
- These are the same hardware
- The difference is in firmware and features
- You can update any HuddleCamHD unit to the latest PTZOptics firmware
Note: If you have a HuddleCamHD version, you may need to follow the instructions to update its firmware before proceeding.
Step 1: Connect the Camera
- Connect the camera to your on-site network/router
- This can be done using a network switch
- Power on the camera
Step 2: Install Control Software
- Use a PC that is connected to the same router as the camera
- Download and install:
SimplTrack Control Software (Windows only)
Step 3: Discover Cameras
- Open the software
- Click Start Search
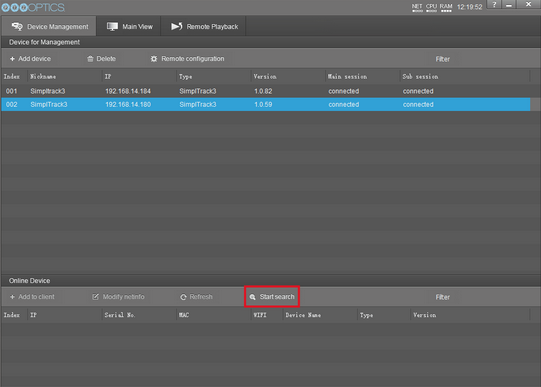
You should see something like the picture below.
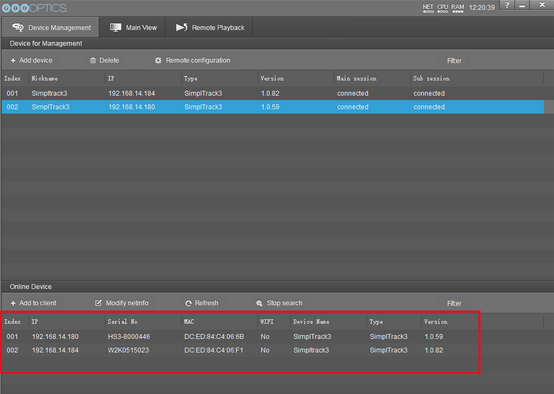
This will show you any SimplTrack 2 or SimplTrack 3 cameras that are on the same network as the computer. It will show either PTZOptics or HuddlecamHD-branded Simpltrack cameras.
Step 4: Add Camera to Client
-
Select your camera from the list from the last step
-
Click Add to Client
-
If this fails, use the IR remote to issue the following command:
[F2] > [0] > [0] > [1]: This will set the IP address to DHCP. Wait for it to finish rebooting, and show up in the software again. Begin back at step 1, select your camera and add it to the client.
-
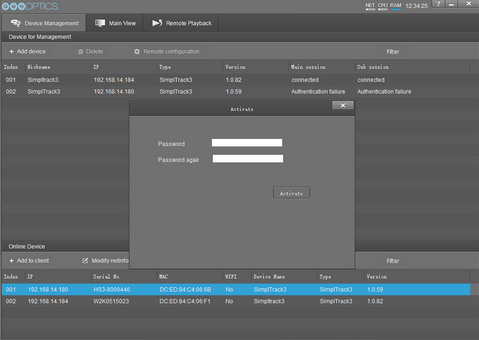
Password Setup
You may be prompted to create a password:
- Maximum: 16 characters
- Cannot be:
HuddlecamHDoradmin
Step 5: Connect to the Camera
- After setting the password:
- Click Add to Client again
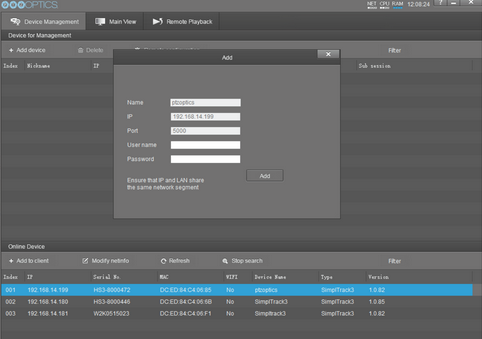
- Click Add to Client again
- Enter:
- Password: your new password
- Username: (leave blank)
The camera should now show as "Connected"
Step 6: Download Latest Firmware
Go to: https://docs.ptzoptics.com/docs/cameras/simpltrack3/firmware/
- Select your camera model (left side)
- Download the corresponding firmware file (right side)
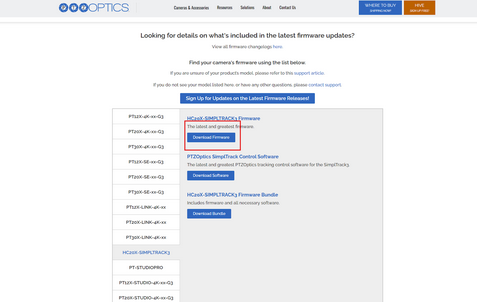
Just be sure to select your camera model on the left, and download the firmware file on the right.
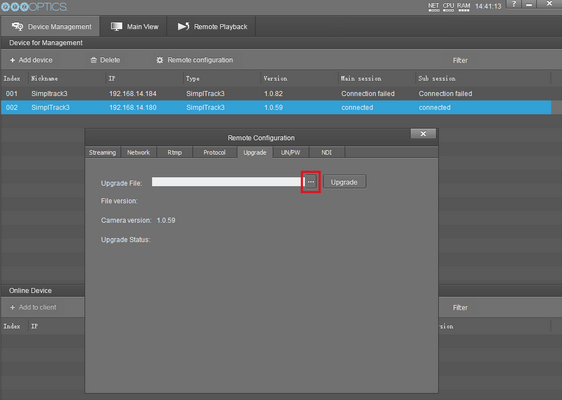
Step 7: Update Firmware
-
In the software:
- Select your camera
- Click Remote Configuration
-
Navigate to the Upgrade tab
-
Click the (3 dots) button to browse for your firmware file
-
Select the file and click Upgrade
Step 8: Wait for Upgrade to Complete
- The process will take a few minutes
- You'll see status messages during the update
When finished:
- Message will display: "Upgrade Firmware Complete, Camera reboot"
- The camera will reboot automatically
- It will reconnect with the new firmware version
Final Notes
- Always ensure a stable network and power during updates
- Do not unplug the camera during firmware upgrade
If you hit any point in this process when you get stuck or are not able to get the camera to update or connect to the software, please contact the PTZOptics support department.