Producer Kit 4K Setup — DHCP
DHCP Setup Step 1: Connect the Hardware
Connect everything in this order, giving each device time to boot:
- Plug the network switch into power.
- Connect your router to the switch with an Ethernet cable, and let it boot up.
- Connect the PT-SUPERJOY-G1 to the switch with an Ethernet cable.
- Connect each camera to the switch, one at a time.
- Connect your computer to the switch, or directly to the router.
A wired Ethernet connection is recommended for the computer, but Wi-Fi works as long as the switch is connected to the router. Once the switch is connected, the router's Wi-Fi network can reach the cameras too.
DHCP Setup Step 2: Confirm the SuperJoy Has an IP Address
With everything powered on, the SuperJoy should display a Local IP at the top of its LCD screen. Write this address down — you will need it in the next step.
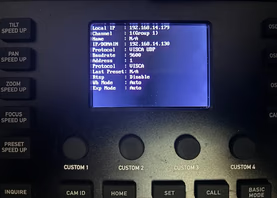
If you see a Configuration Failed message instead, the joystick did not receive a DHCP address. Switch it back to DHCP:
- Press the SETUP button.
- Scroll down to the Network selection.
- Push the joystick left or right until it reads DHCP.
- Press ENTER twice to reboot the joystick in DHCP mode.
If it still does not get a Local IP after rebooting, see Configuration Failed for more troubleshooting steps, or give us a call.
DHCP Setup Step 3: Log In to the SuperJoy Web Interface
Type the SuperJoy's Local IP address into a browser on your computer.
You should be prompted to set a new password. The password can be up to 16 characters with no banned characters. After setting it, log in with admin as the username and your new password.
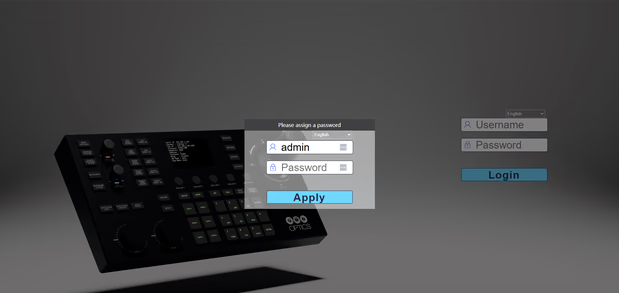
If you are not prompted to set a password, the SuperJoy is on older firmware — log in with admin as the username and leave the password blank.
If the web interface will not load at all, there is likely a problem with the network connection, the cabling, or the IP address. Confirm each of those, and if the page still will not open, contact support.
DHCP Setup Step 4: Find and Add Your Cameras
- In the SuperJoy web interface, go to the Search tab in the upper left.
- Run a PTZOptics search. Each of your cameras should appear in the list.
- Write down the IP address of each camera — you will need them later to adjust camera settings.
- Highlight a camera and click Add.
- Enter a Channel and a Cam Name, then save.
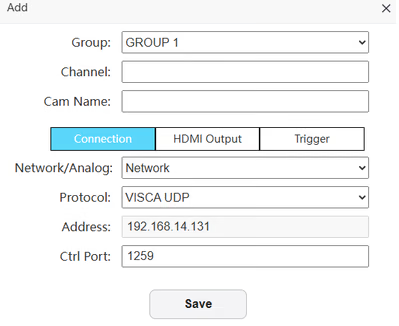
The channel is the camera number on the joystick: channel 1 is the CAM1 button, channel 2 is CAM2, and so on. The name can be anything, but using CAM1, CAM2, and CAM3 keeps things easy to track.
Repeat for all three cameras. You should now be able to press CAM1 through CAM3 on the joystick and control each camera.
Continue with the shared setup steps after adding the cameras.