Ceiling Mount Installation Guide
This guide covers mounting a PTZOptics two-piece surface ceiling mount (PT-CM-1 or PT-CM-3) to wood ceilings, drywall ceilings, or U.S. and European electrical boxes, then locking the camera bracket onto the ceiling bracket.
What's in the Box
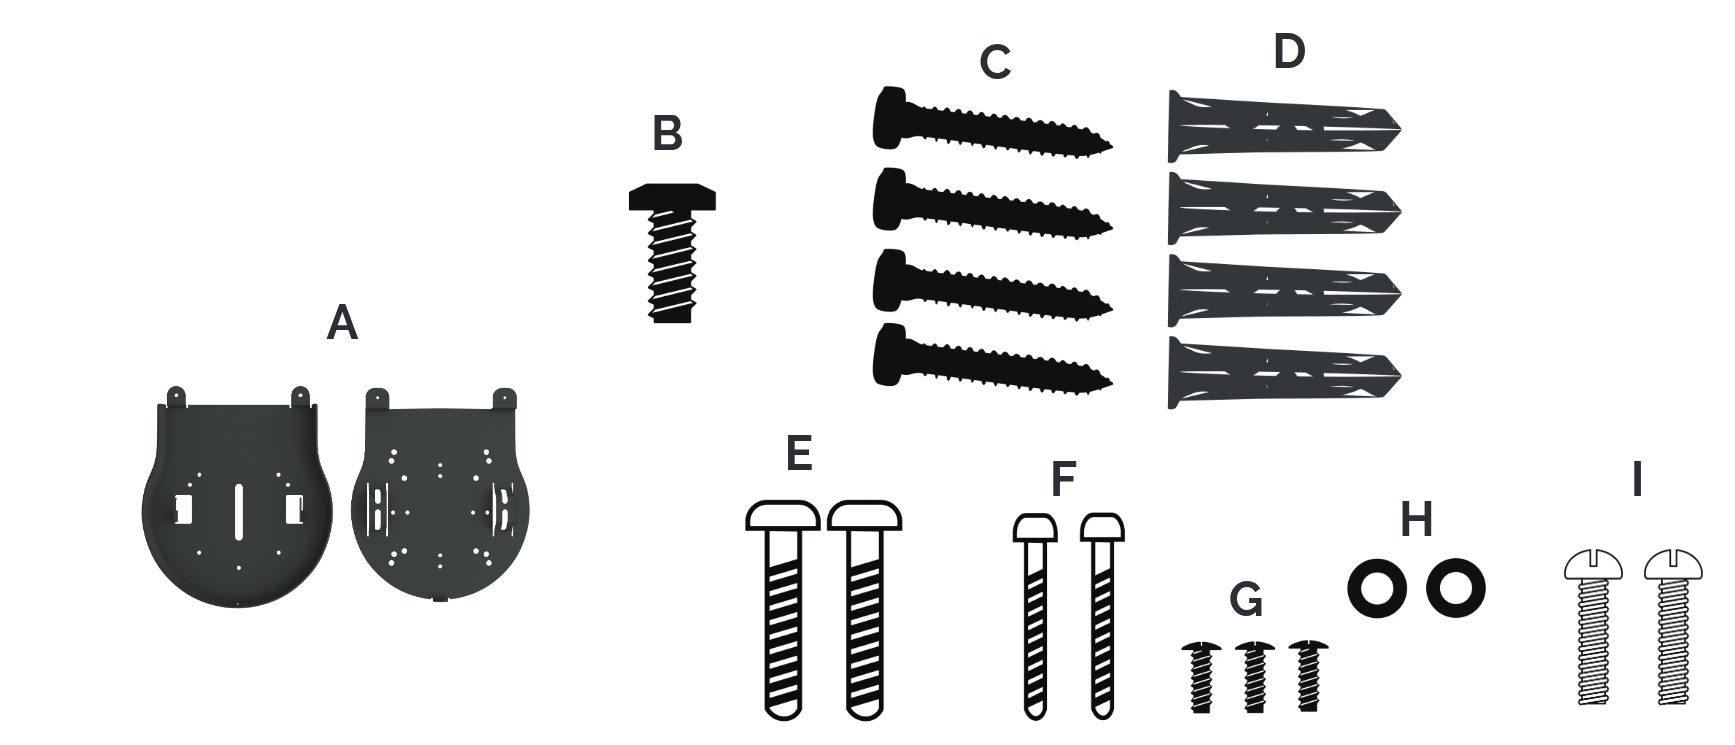
| Callout | Component | Quantity |
|---|---|---|
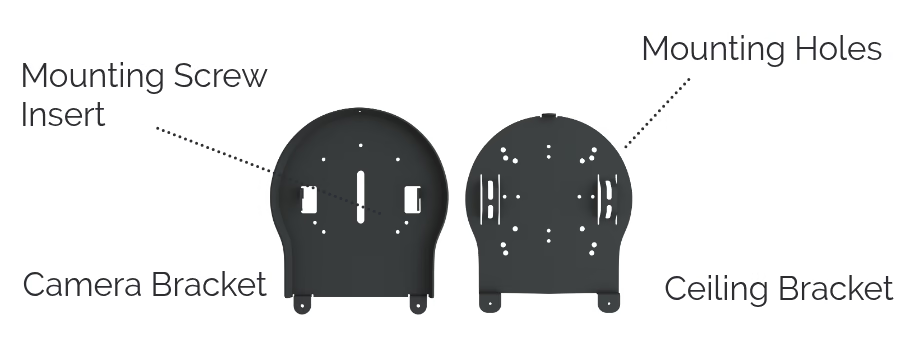
| A | Ceiling mount assembly: ceiling bracket (1) and camera bracket (1) | 1 set |
| B | 1/4"-20 camera mounting screw | 1 |
| C | #10-16 x 1-1/4" Phillips pan-head sheet metal screws | 4 |
| D | #10-12 x 1" conical plastic drywall anchors | 4 |
| E | #8-32 x 1" U.S. 4" junction box mounting screws | 2 |
| F | #6-32 x 1" U.S. single-gang device box mounting screws | 2 |
| G | M3 x 6 mm bracket safety screws | 3 |
| H | 1/4" USS flat washers for 1/4"-20 screw | 2 |
| I | M3.5 x 25 mm European electrical box mounting screws | 2 |
Hardware Used by Mounting Surface
| Mounting Surface | Required Hardware from Box |
|---|---|
| Wood Ceiling | 4x #10-16 x 1-1/4" Phillips pan-head sheet metal screws (C) |
| Drywall Ceiling | 4x #10-12 x 1" conical plastic anchors (D) and 4x #10-16 x 1-1/4" Phillips pan-head sheet metal screws (C) |
| U.S. Single-Gang Device Box | 2x #6-32 x 1" Phillips pan-head machine screws (F) |
U.S. 4" Junction Box | 2x #8-32 x 1" Phillips pan-head machine screws (E) |
| European Electrical Box | 2x M3.5 x 25 mm European box mounting screws (I) |
Attaching the Ceiling Bracket
Drywall or Wood Ceiling Installation
Wood Ceiling Installations
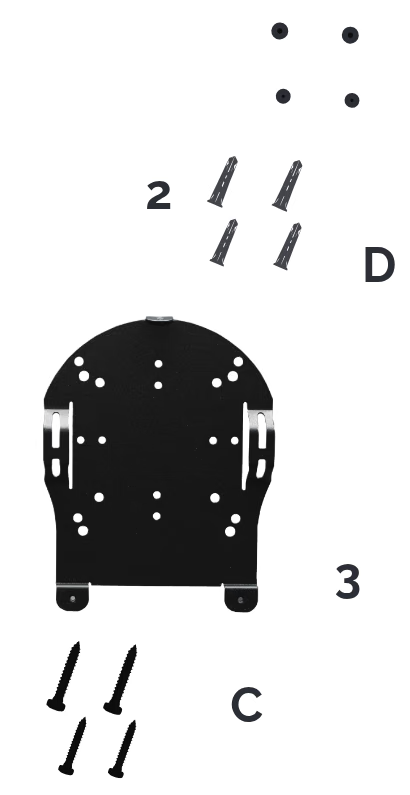
When mounting directly into wood joists or structural wood backing, skip step 2 and drive the four #10-16 x 1-1/4" metal screws (C) directly into the wood.
- Hold the ceiling bracket (A) against the ceiling in the desired orientation and mark four symmetrical mounting hole positions.
- Drill holes at the four marked locations and insert the
#10-12 x 1"conical plastic drywall anchors (D). - Place the ceiling bracket against the ceiling and fasten it securely using the four
#10-16 x 1-1/4"metal screws (C).
Electrical Box Installation
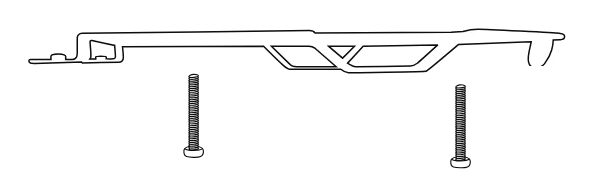
- Align the screw holes running down the center line of the ceiling bracket (A) with the threaded mounting ears of your installed electrical box.
- Fasten the ceiling bracket to the box using the two matching box screws:
#6-32 x 1"(F) for a U.S. single-gang device box,#8-32 x 1"(E) for a U.S.4"junction box, orM3.5 x 25 mm(I) for a European electrical box.
Attaching the Camera and Securing the Brackets
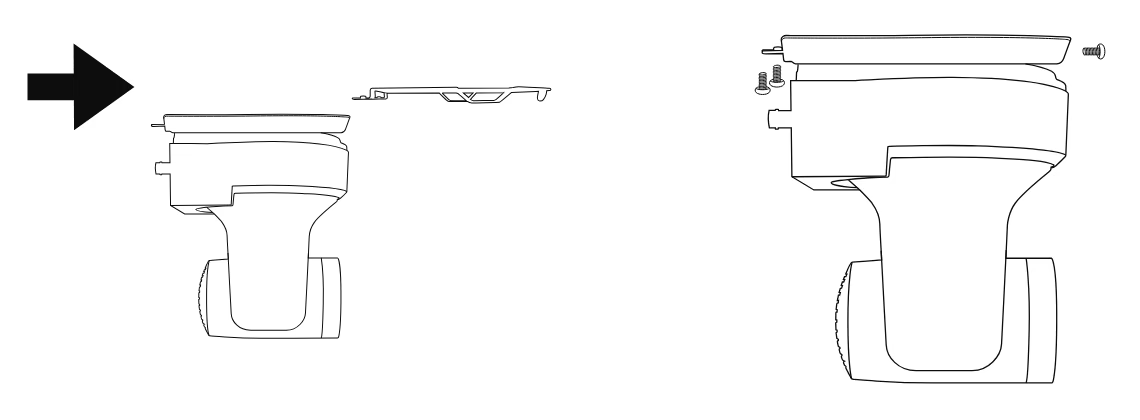
- Attach the camera bracket (A) to the bottom of the camera using the
1/4"-20mounting screw (B). If the camera is not tightly secured against the bracket, add one or both of the included1/4"USS flat washers (H) as needed. - Slide the camera bracket (with the camera attached) into the ceiling bracket until the locking tabs engage fully.
- Secure the camera bracket to the ceiling bracket using all three
M3 x 6 mmsafety screws (G)—two at the rear tabs and one at the front tab—then connect your cables.