Pole Mount Installation Guide
This guide covers threading a PTZOptics open-base pole mount (HCM-1C, HCM-2C, or PT-PM-3) onto a 1" NPT pipe drop and attaching your camera.
What's in the Box
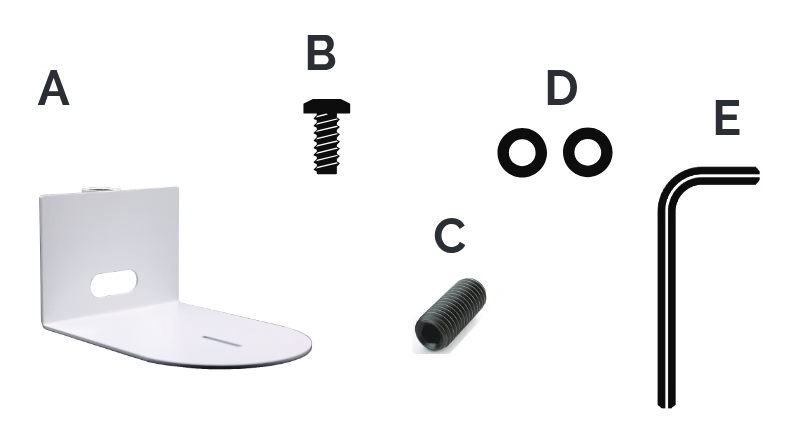
| Callout | Component | Quantity |
|---|---|---|
| A | Pipe ceiling mount (HCM-1C, HCM-2C, or PT-PM-3) | 1 |
| B | 1/4"-20 camera mounting screw | 1 |
| C | #10-32 x 1/4" cup-point set screw | 1 |
| D | 1/4" USS flat washers for 1/4"-20 screw | 2 |
| E | 3/32" long-arm hex wrench | 1 |
Required Additional Hardware
A threaded 1" NPT pipe and overhead structural pipe flange/anchor are required for installation and are sold separately to match your ceiling drop length.
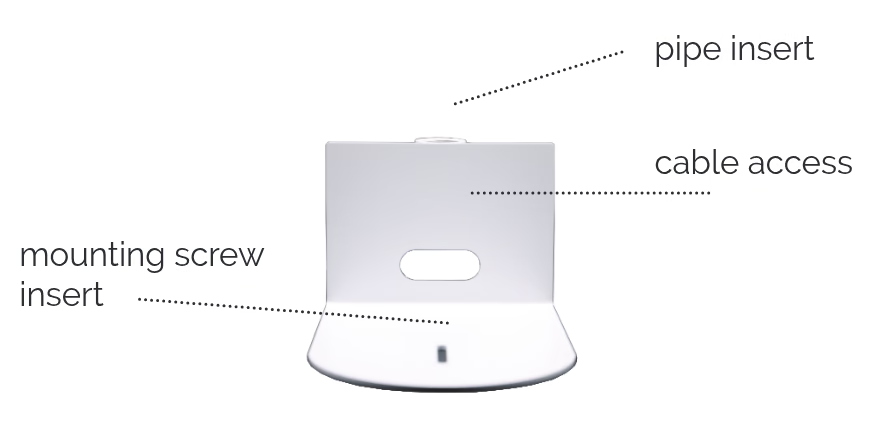
Attaching the Mount to a 1" NPT Pipe
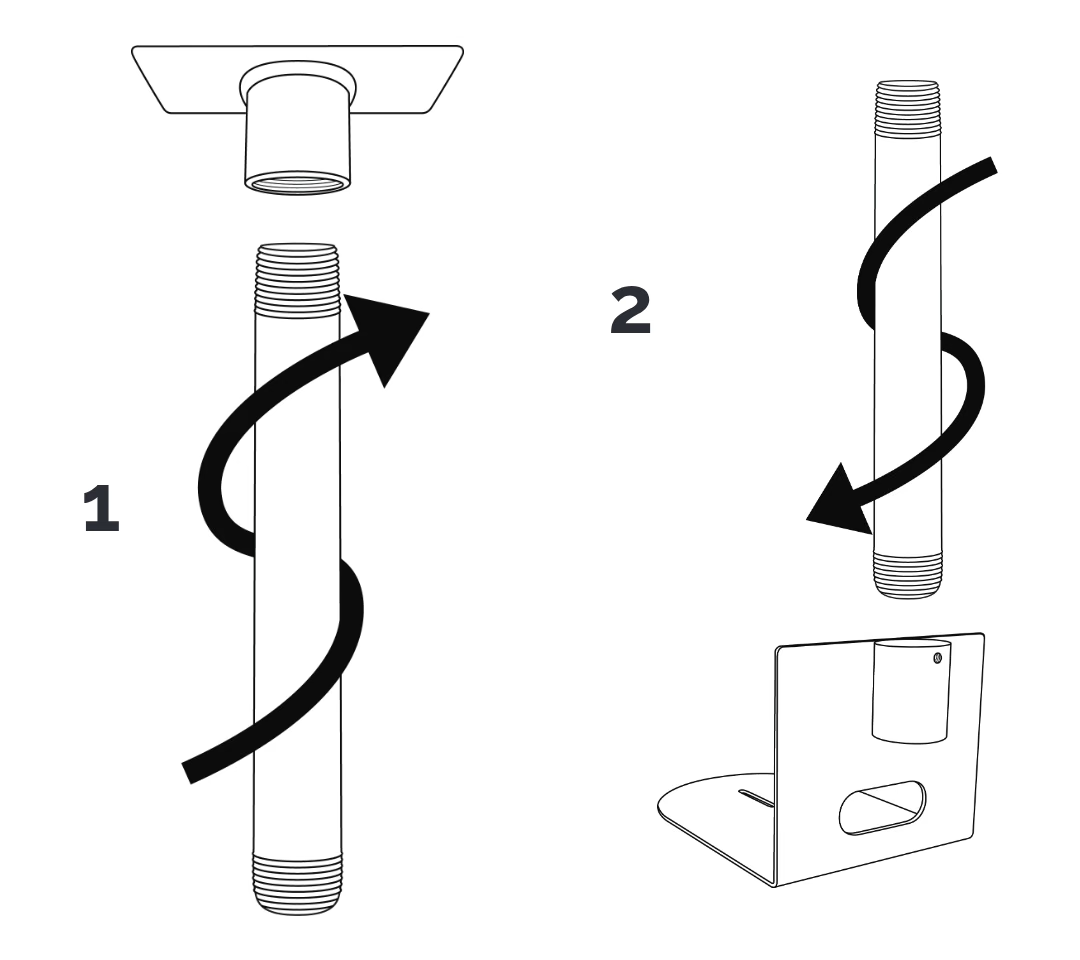
- Thread a
1" NPTpipe securely into your overhead structural pipe flange or anchor. - Thread the pole mount (A) onto the bottom of the
1" NPTpipe and orient the mount facing the desired camera direction. - Using the included
3/32"hex wrench (E), tighten the#10-32 x 1/4"cup-point set screw (C) into the threaded hole on the back of the pipe collar to lock the mount in place and prevent rotation.
Attaching the Camera to the Mount
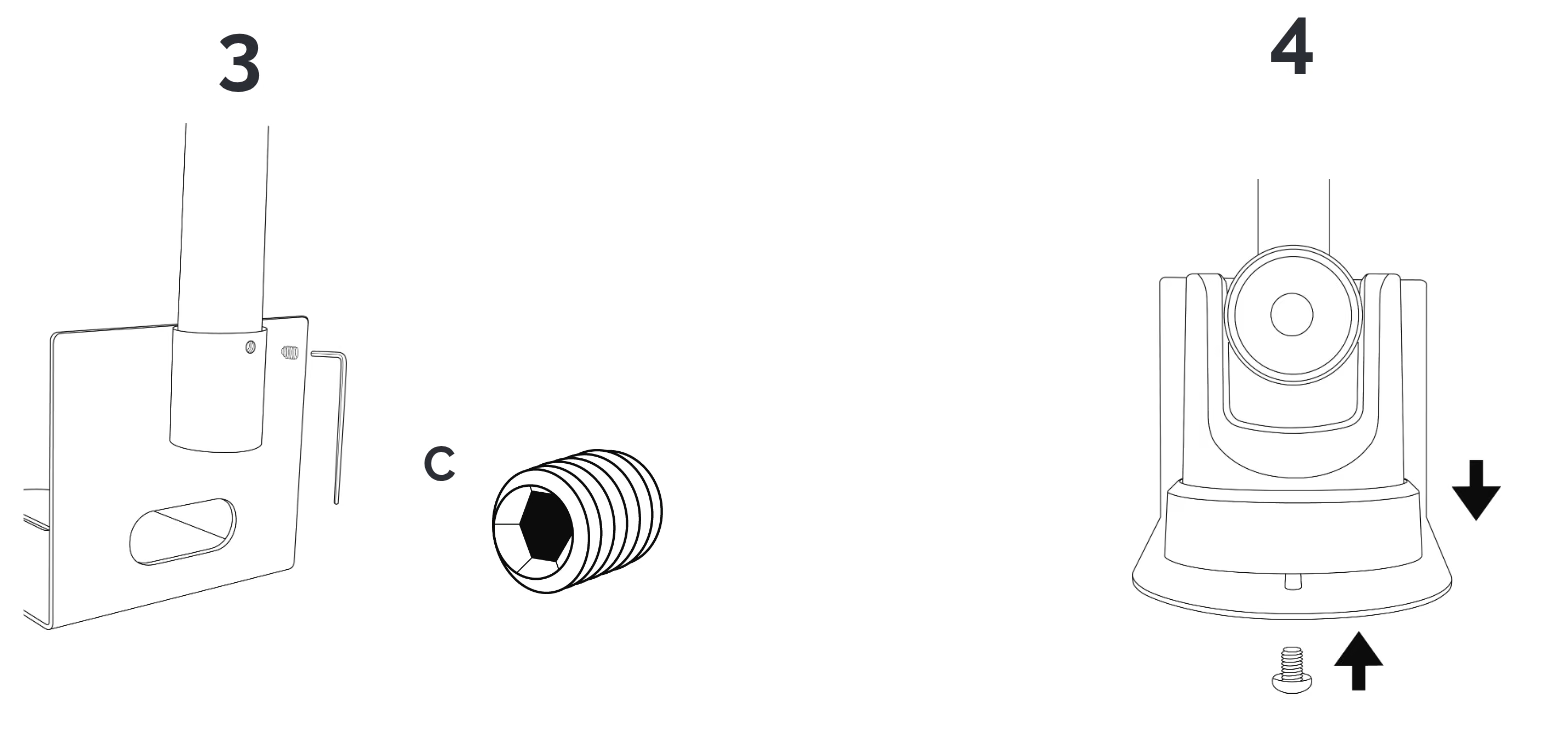
- Position the camera on the mount base in the desired orientation, leaving enough clearance behind the camera for cabling.
- Secure the camera to the pole mount from underneath using the
1/4"-20mounting screw (B). If the camera is not tightly secured against the mount base, add one or both of the included1/4"USS flat washers (D) as needed. - Connect your power, video, network, and control cables to the camera.