Adding and Managing Cameras
Use the Devices page to discover, add, edit, view, and remove camera entries.
Adding Your First Camera
This walkthrough uses a PTZOptics camera as an example to add your first camera to the MiniJoy Web UI. You can follow the same workflow for other supported cameras.
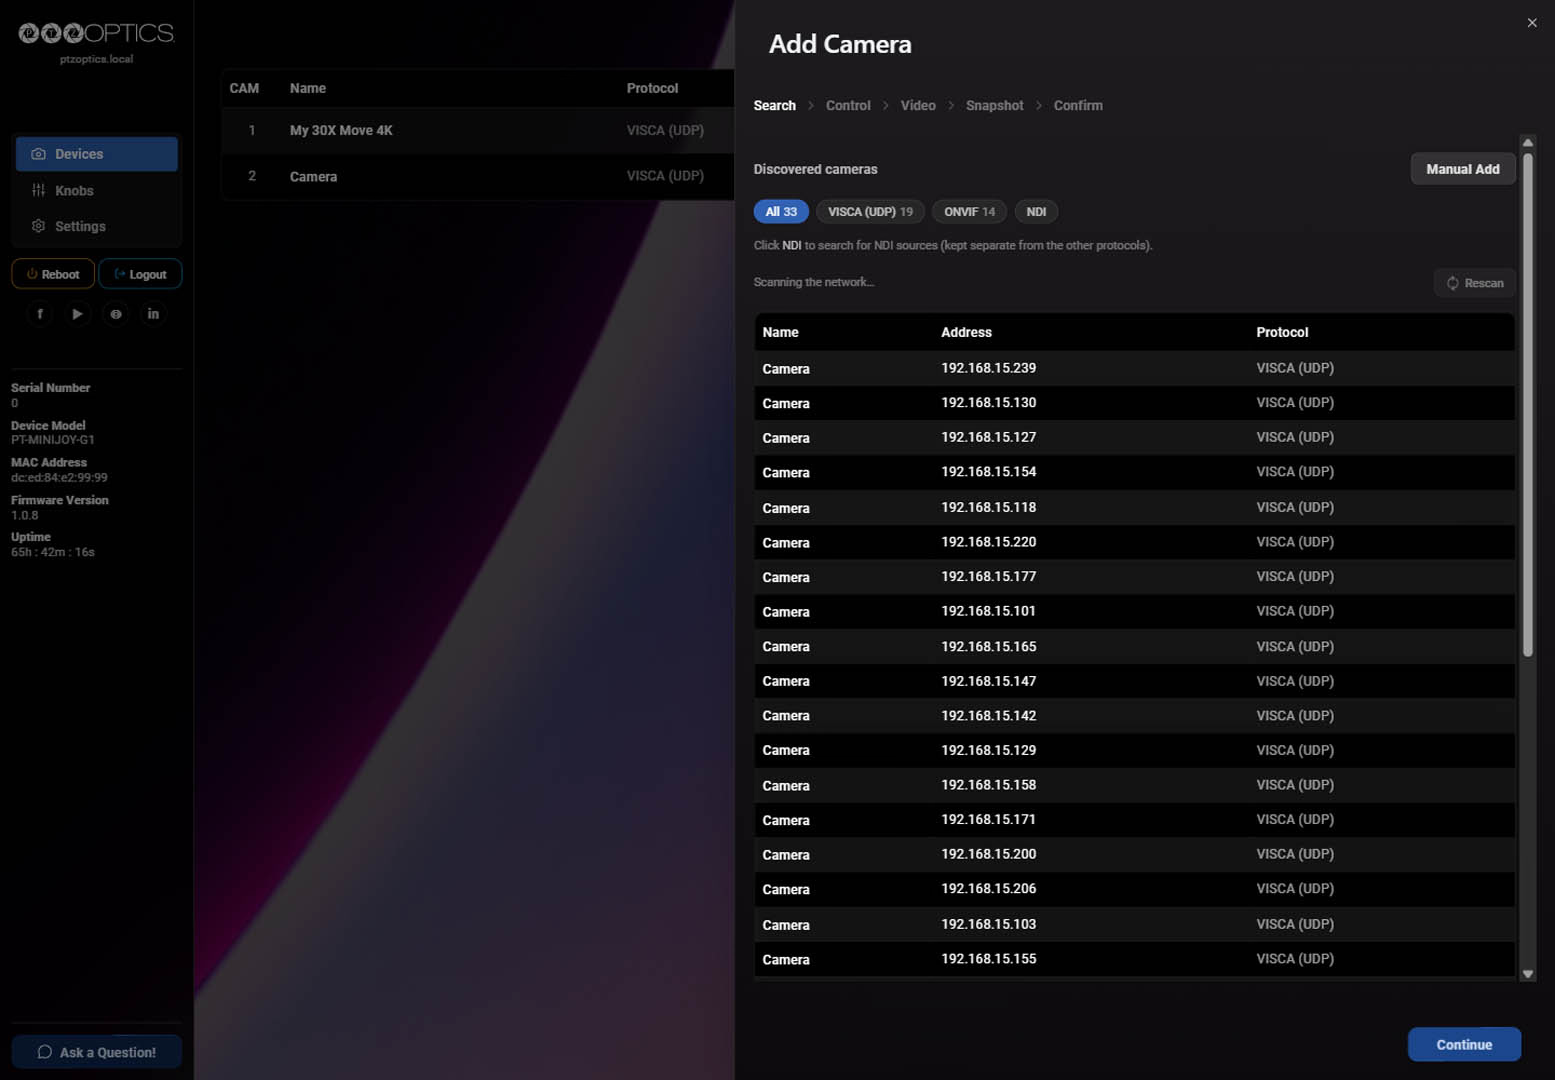
The Search stage provides a list of all devices that the MiniJoy discovers as available to add. Discovery can identify a camera and populate some fields, but it does not confirm every setting required for control, video, and snapshots.
Open your camera Web UI in another browser tab or window so that you can reference its configuration. If you cannot keep it open, write down the following information before continuing:
- Camera IP address
- Enabled control protocol and its port, when applicable
- Whether HTTP authentication is enabled and the required credentials (Most PTZOptics cameras have this setting enabled by default. If you are trying to add a PTZ camera from another manufacturer, check its documentation for this setting.)
- Video streaming method and its stream or connection details
Keep this information available as you complete the Control, Video, and Snapshot stages.
Additionally, if HTTP Authentication is not enabled, you will not need to enter credentials for the snapshot and video stages.
Gen 3 Web UI documentation for more details.
Horizon Web UI documentation for more details.
Open Add Camera
1. Make sure you are on the Devices page.
2. Click Add Camera in the bottom-right corner of the page to start searching for cameras. Results are grouped under All,
VISCA (UDP), and ONVIF. Select NDI to start a separate NDI source search.
Select Your Camera
1. Locate your PTZOptics camera in the list of discovered devices. Click its row to select it, then click the Continue button.
If the camera is not listed:
- Double-check that the camera is powered on and connected to the same network as the MiniJoy.
- If it still does not appear, try selecting Manual Add, then enter the connection details from the camera Web UI.
Configure Your Camera
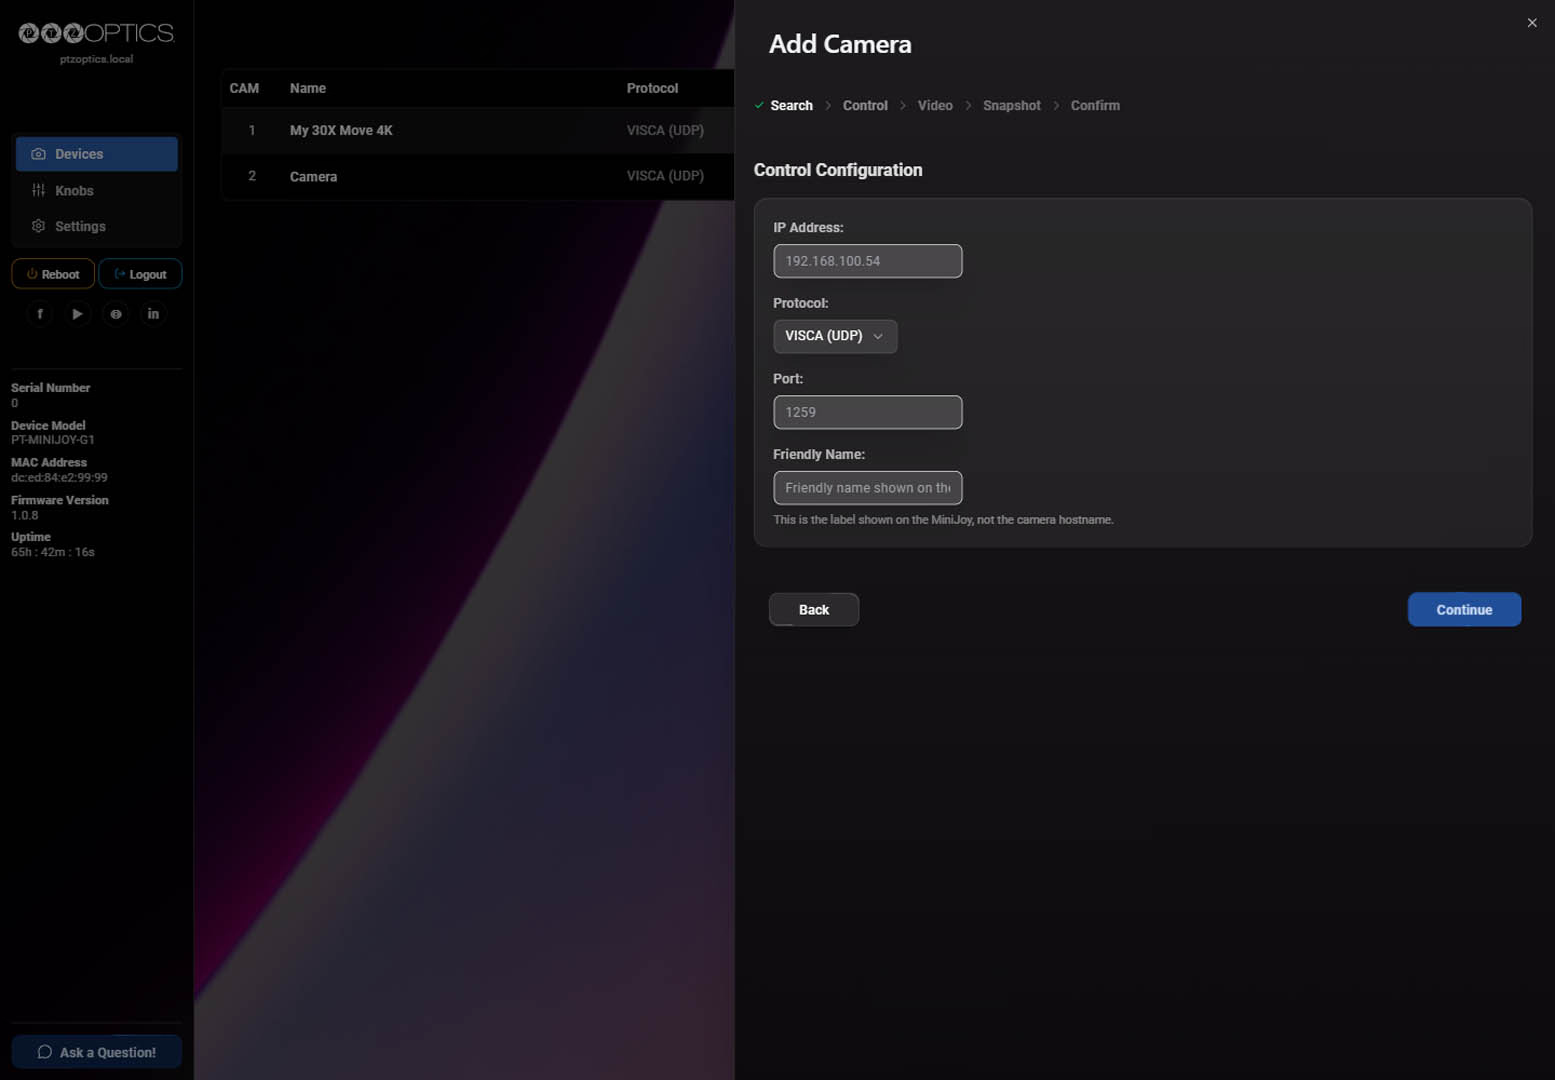
Complete each stage using the settings shown in your PTZOptics camera's Web UI:
1. Control: Verify the IP address and select the control protocol used by the camera. (For PTZOptics cameras, we recommend using VISCA (UDP) for control. The default port number is 1259)
We recommend entering a friendly name at this stage. This will make it easier to differentiate the camera later if your list of added cameras continues to grow.
2. Video: Select the camera's video streaming method. We recommend RTSP (UDP) (The default port number is 554).
3. Snapshot: Enter the still-image path. Configure authentication to match the camera's HTTP authentication setting. (Choose Digest for PTZOptics cameras. If using another manufacturer, refer to its documentation for the appropriate setting.)
4. Confirm: Review all three configurations, then select Save.
Verify Your Camera
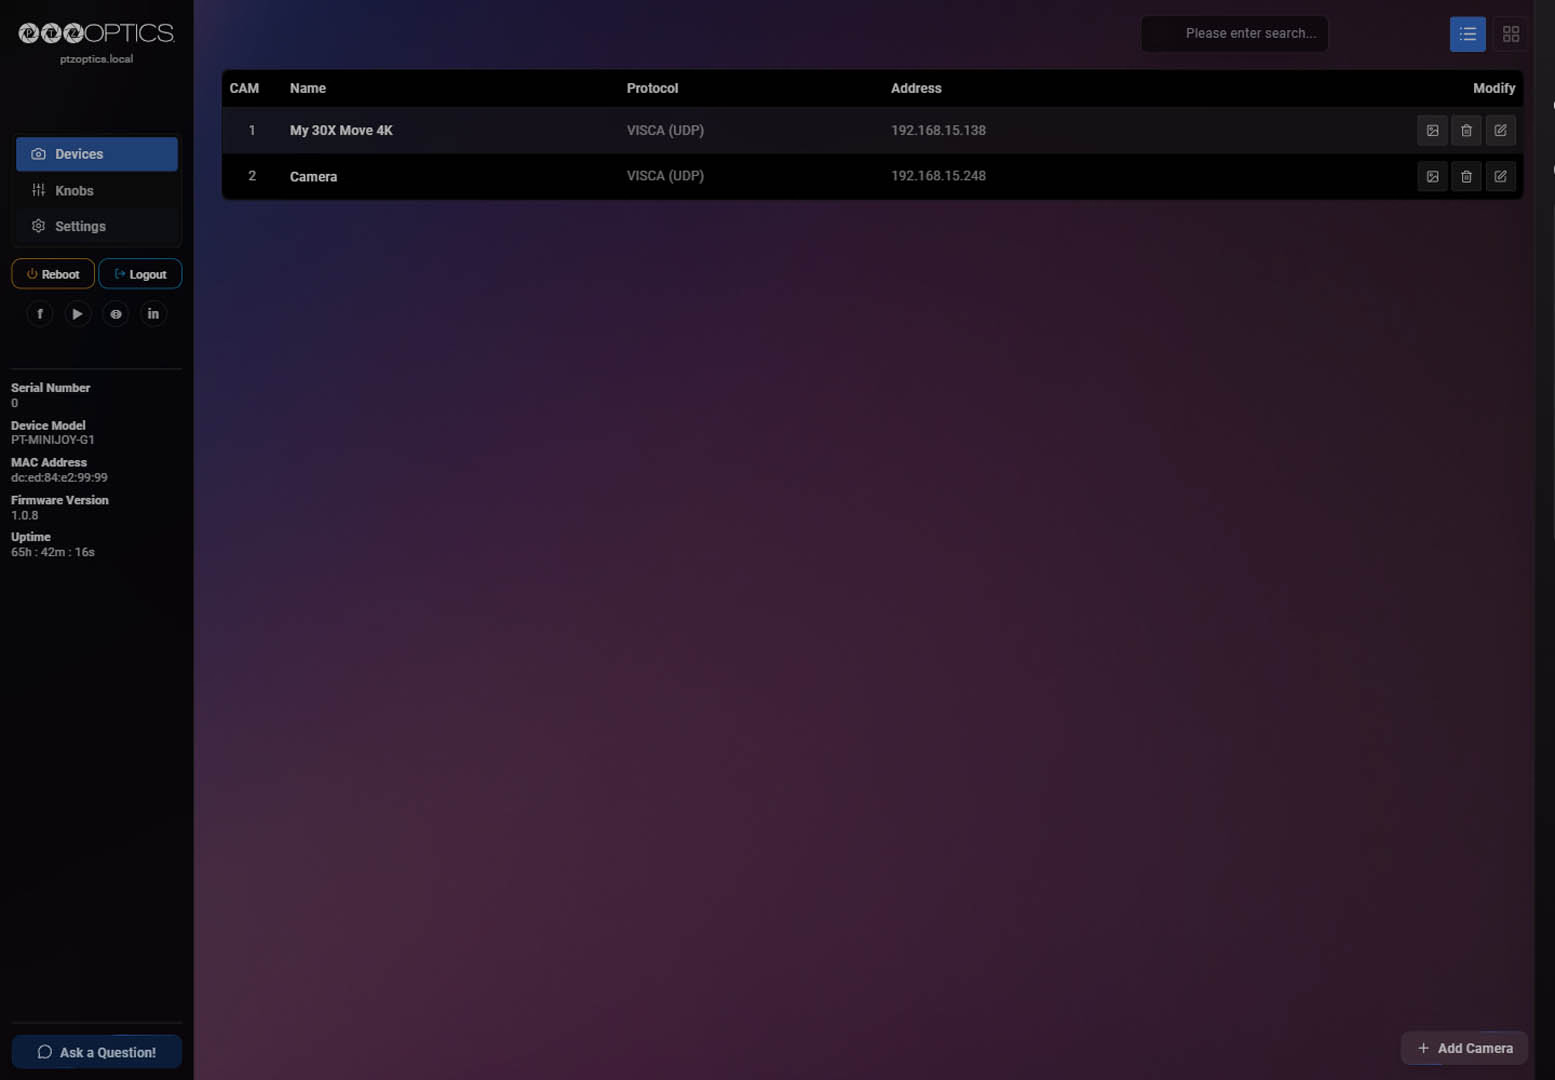
1. Confirm that the new row appears on Devices with the expected name, protocol, and address.
2. Open Edit Device and confirm the saved video method.
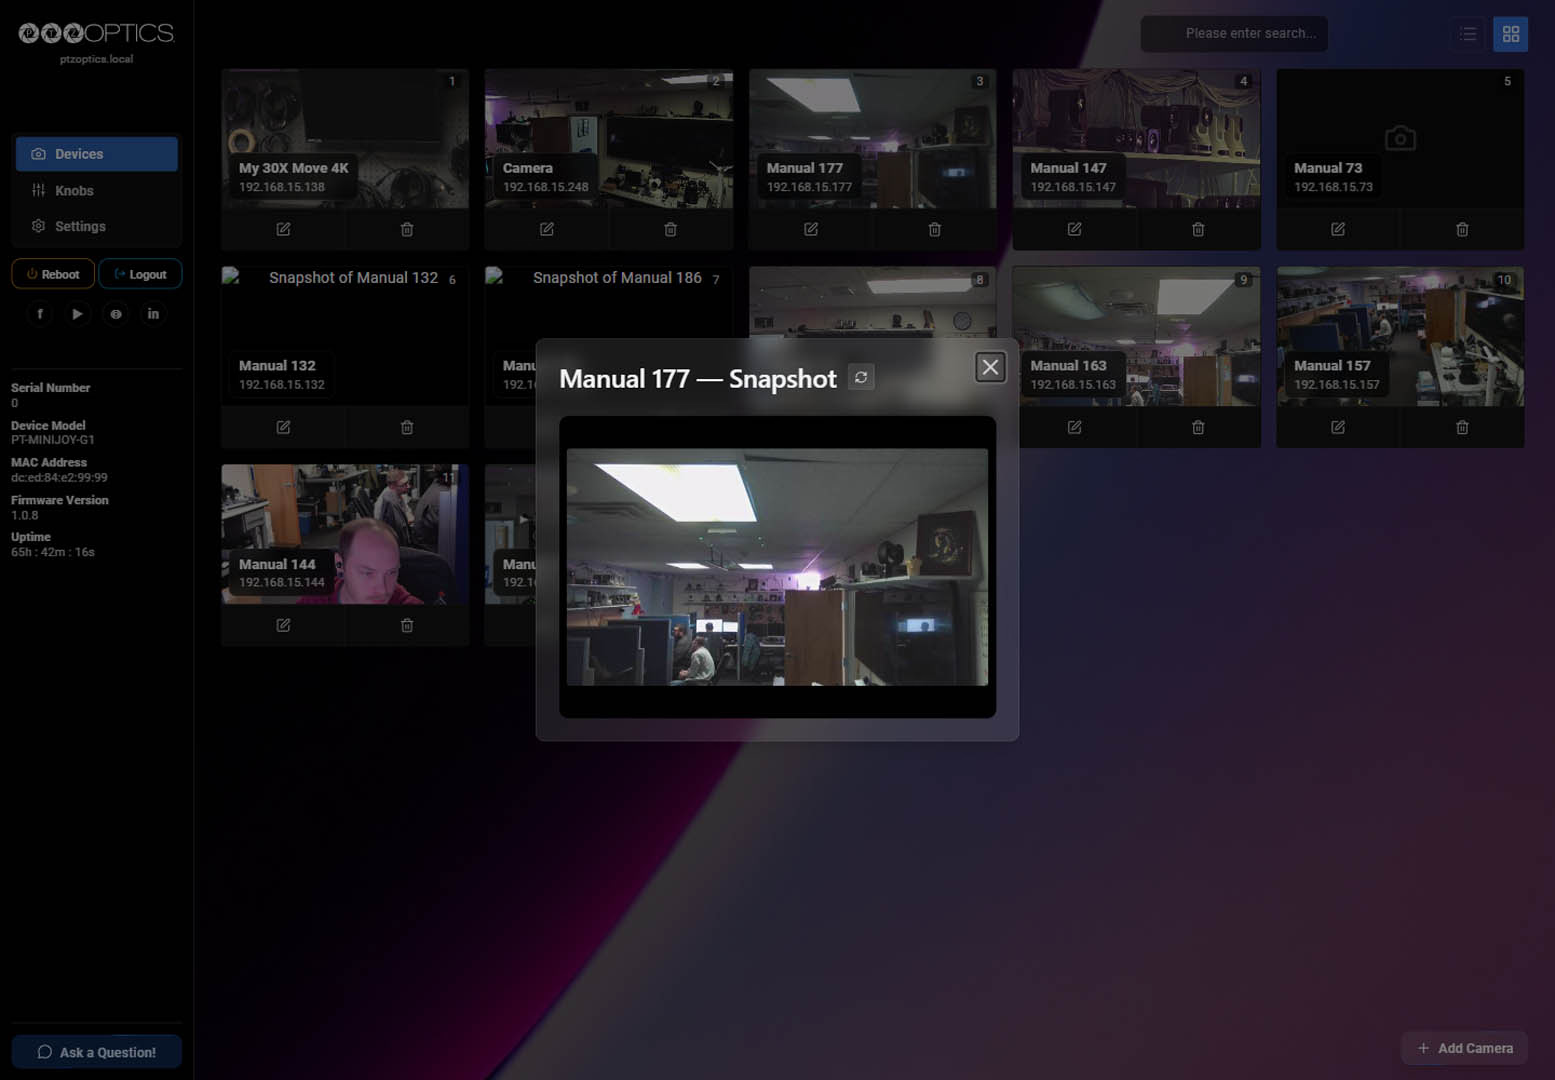
3. Select Show Snapshot and confirm that the current still image loads.
4. Use the physical MiniJoy to test an approved PTZ control and the configured continuous preview.
If you would like to view the snapshots from all currently added cameras, select the grid view option on the Devices page.
Find a Configured Camera
To quickly locate a configured camera, open Devices, then enter part of a friendly name or IP address in the search field. Use the list and grid controls to change the layout.
Adding a Camera Manually
You can add a camera manually if it does not appear in the search results. Follow these steps:
- Select Add Camera.
- Select Manual Add.
- Enter the camera IP address.
- Select the control protocol and enter its port when required.
- Enter a friendly name.
- Complete Video, Snapshot, and Confirm, then select Save.
Editing a Camera
- On Devices, select Edit Device for the camera.
- Update the required stage:
- Control: Address, protocol, port, friendly name, and applicable credentials
- Video: Method, quality or RTSP fields, and applicable credentials
- Snapshot: Still-image path and HTTP authentication type
- Open Confirm and review all sections.
- Select Save.
Viewing a Camera Snapshot
Select Show Snapshot in list view, or select a camera image in the grid view. Click the refresh button in the snapshot pop-up to request another still image.
Removing a Camera
- On Devices, select the Delete Device icon (trash can) for the camera.
- Confirm the deletion when prompted.
- Confirm that the camera no longer appears in the Devices list.
Deleting a device removes its configuration from the MiniJoy. It does not reset or delete settings stored on the physical camera.
For complete field and protocol details, see the Camera Configuration Reference.