Get Started with the Horizon Web UI
This tutorial walks you through your first session in the Rise 4K Horizon Web UI: signing in to the Dashboard, steering the camera with the virtual joystick, saving and recalling a shot, and deleting the test shot when you finish.
- The camera's IP address (see Networking if you have not found it yet)
- Your administrator username and password
- A browser on the same local network as the camera
Step 1: Sign In to the Dashboard
- Enter
http://[camera-ip]/in your browser, replacing[camera-ip]with the camera's IP address. - Confirm Username (
adminby default), enter your Password, and select Sign in. If this is a new camera, complete the initial password setup prompt first.
You land on the Dashboard workspace, with Quick Tools, Quick Modes, and Speed presets on the left, the live video preview in the center, and the shots strip along the bottom.
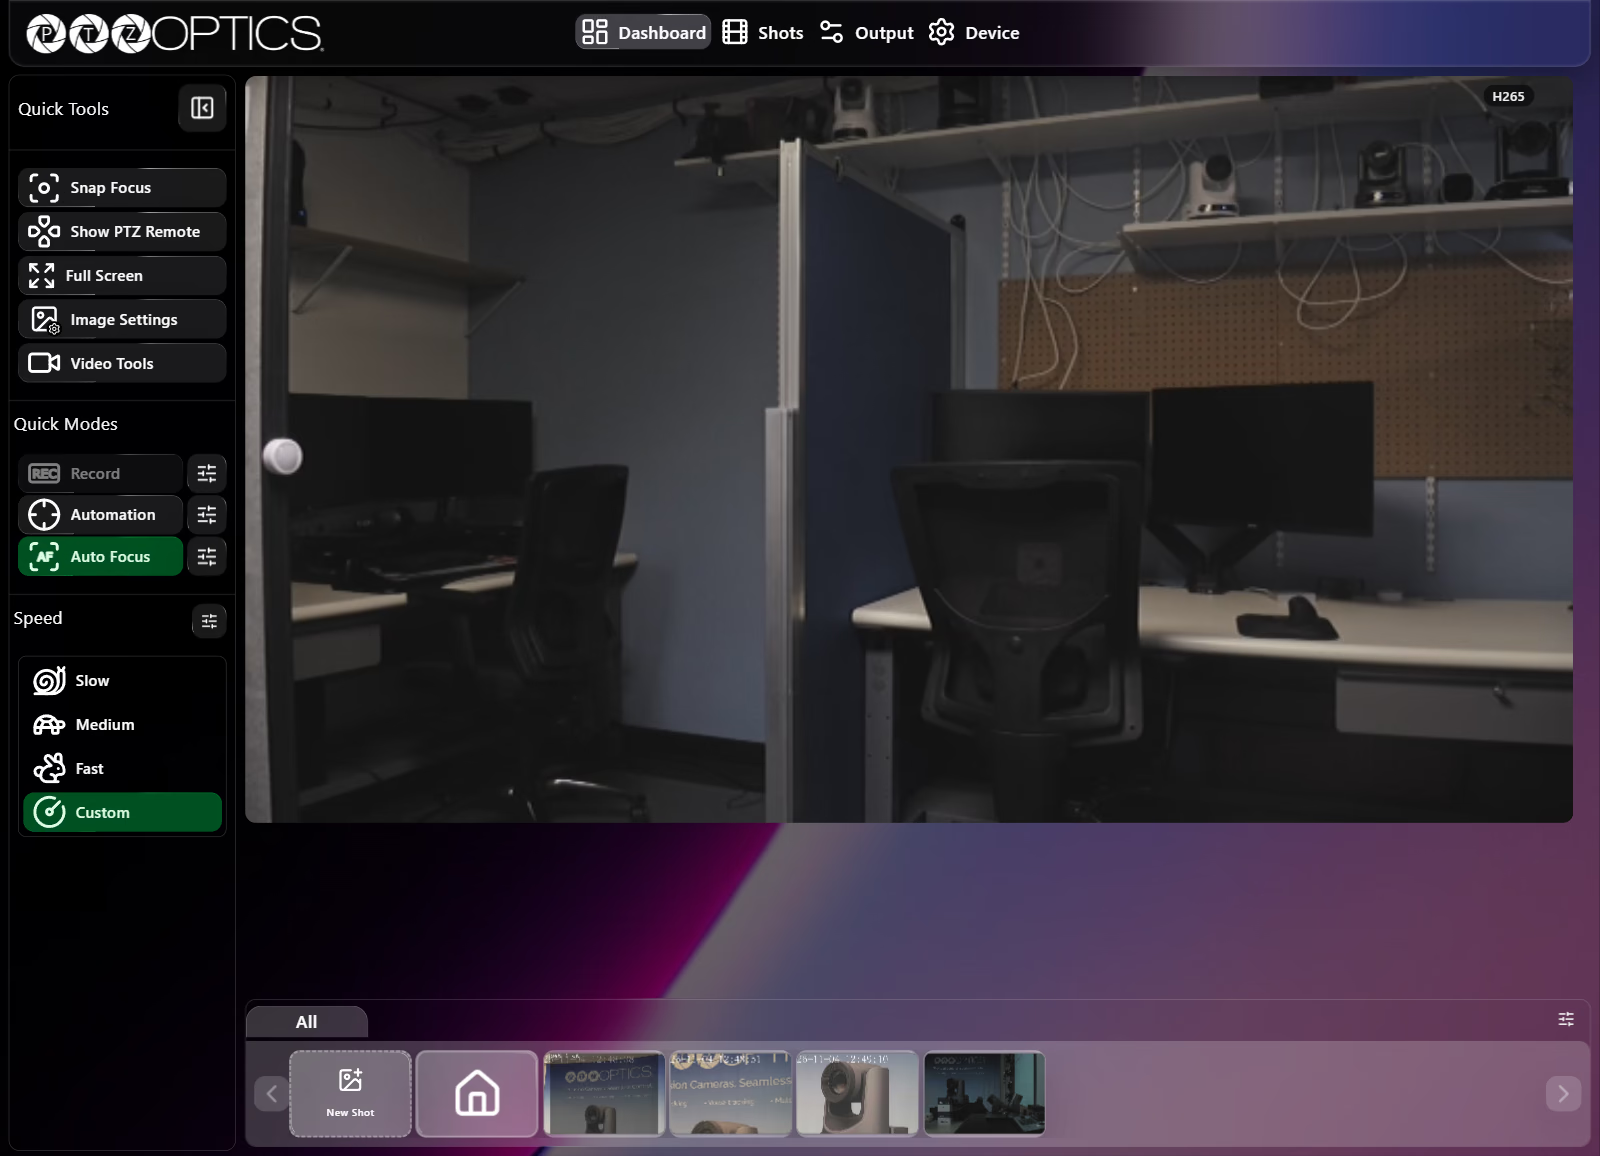
Step 2: Virtual Joystick Control
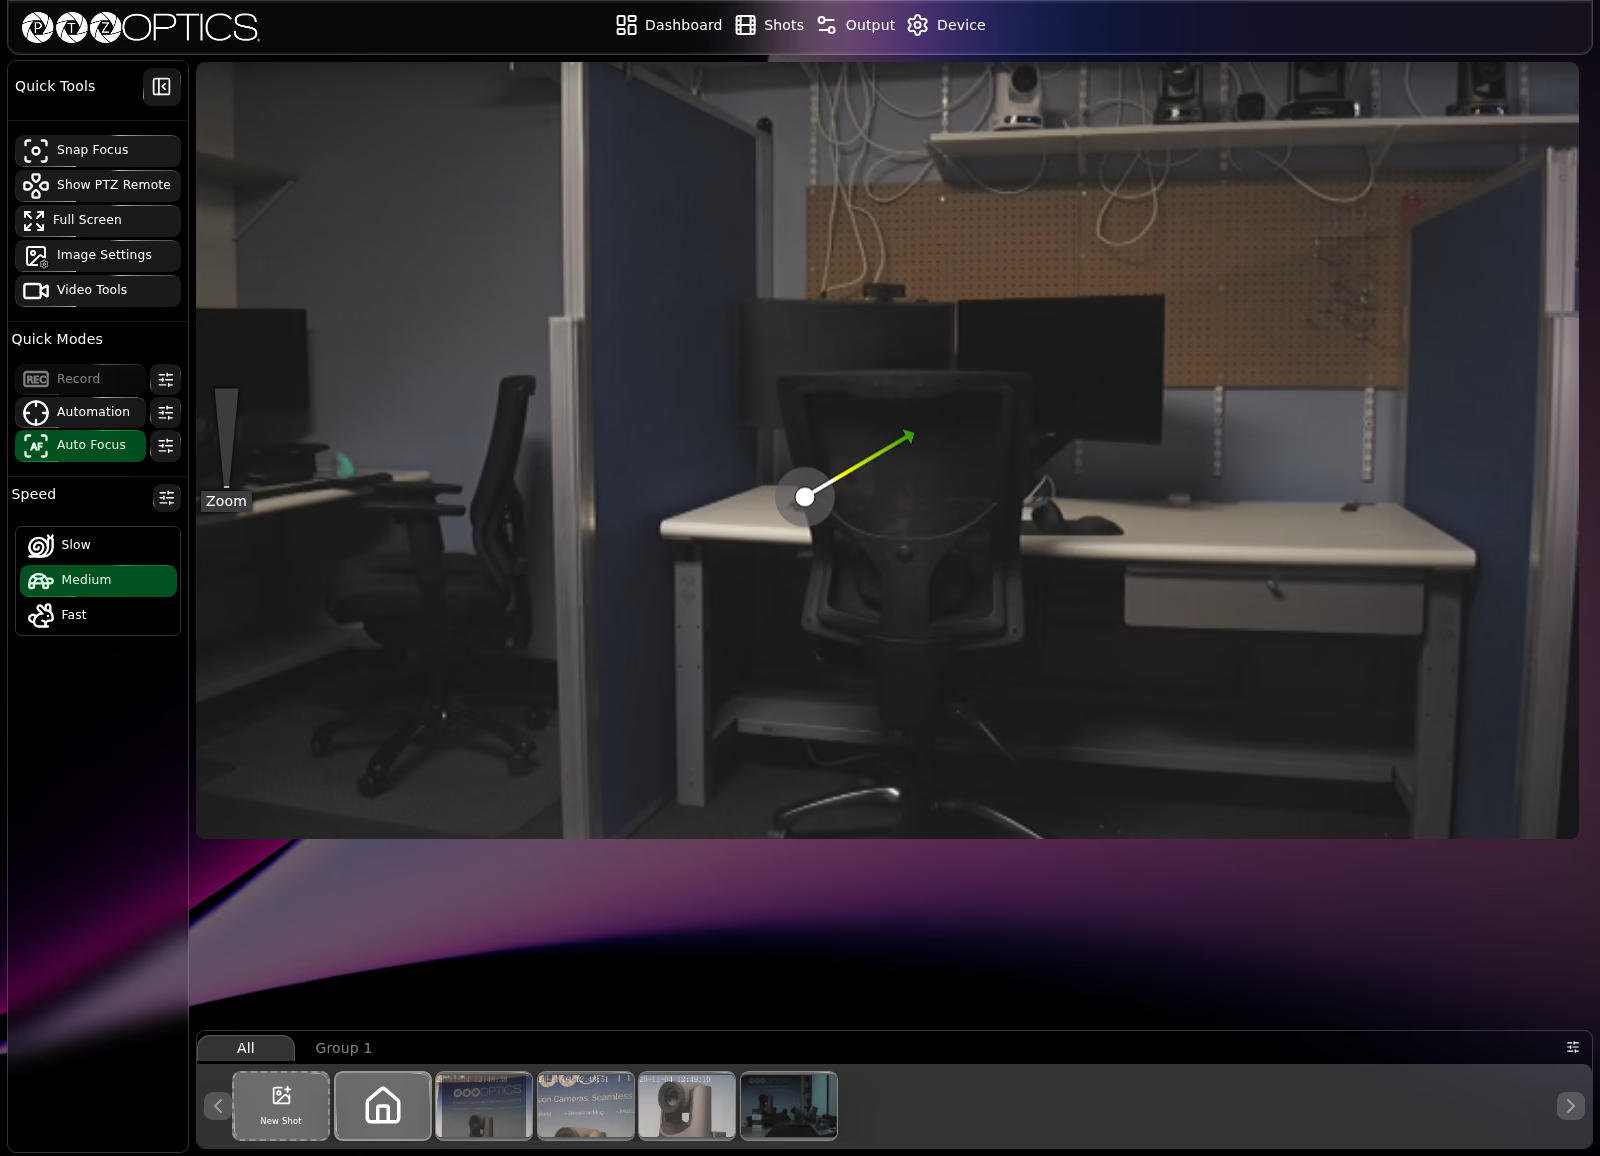
By default, the Dashboard live video preview uses Point/Drag Mode, so you can steer the camera directly on the video canvas without opening a separate remote:
-
Pan and tilt with the virtual joystick: Click and hold anywhere on the live video preview, then drag in the direction you want the camera to move. A directional arrow extends from your starting point—dragging further from the starting point increases movement speed in that direction, and releasing the mouse button stops the camera. You can also click and release any spot on the video preview to center the camera on that point.
-
Adjust zoom: Scroll your mouse wheel over the video preview (or drag the vertical Zoom control that appears along the left edge of the preview) to zoom in or out.
Step 3: Save, Recall, and Delete a Shot

-
In the shots strip along the bottom of the Dashboard, select New Shot.
Horizon saves the current camera position and image settings immediately and adds a thumbnail to the strip. By default, shots are named
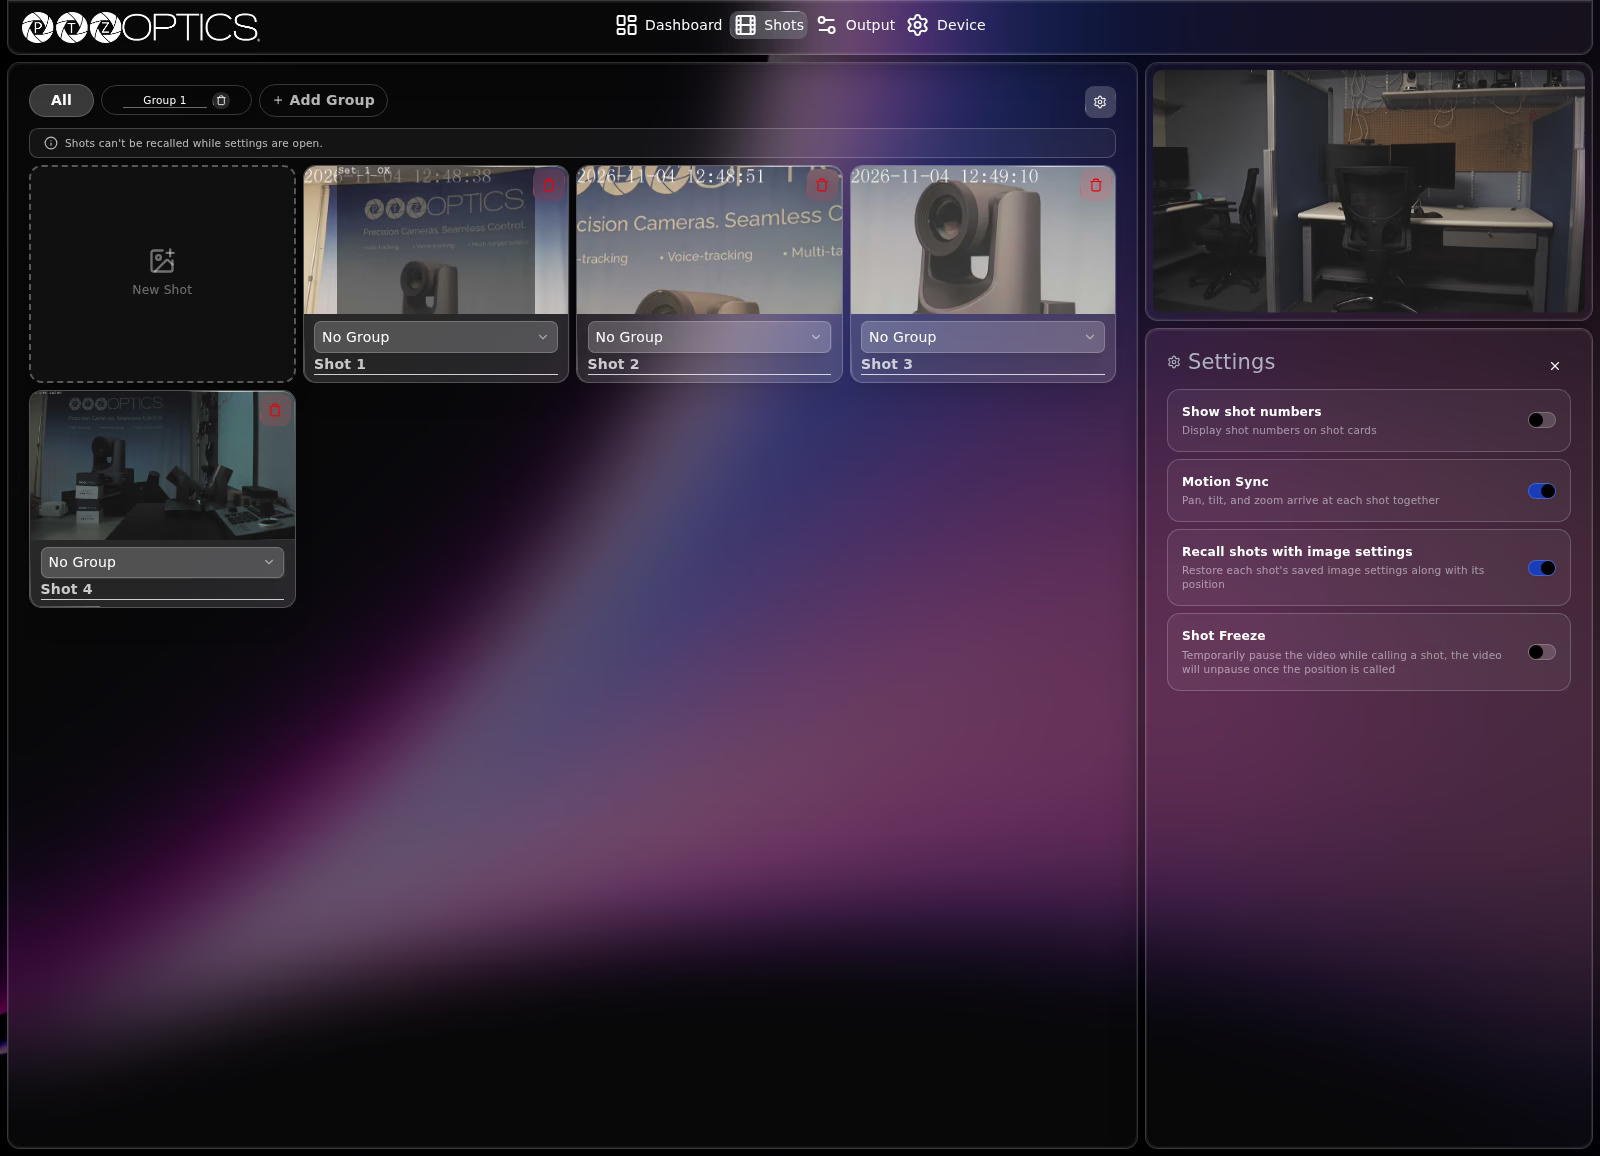
Shot #, where#is the next available shot number—for example, if you have5shots namedMidfield Wide,Home Bench,Visitor Bench,South Pylon, andTunnel Entrance, the next shot saved will be calledShot 6.Shot names are displayed on the Shots page rather than on the Dashboard thumbnails.
-
Select the built-in Home card (house icon) next to New Shot in the bottom shots strip to move the camera to its home position.
-
In the shots strip along the bottom of the Dashboard, select the thumbnail for the test shot you just created and confirm that the camera returns to your saved position.
-
To view the generated shot name and remove the test shot, select Shots in the top header (or the sliders icon at the right end of the shots strip), select the gear icon beside the group tabs to open Settings, and select the red trash icon on the test shot card.
-
Select X at the top right of the Settings panel to return to normal shot recall mode.
Next Steps
You have signed in to Horizon, steered the camera with the virtual joystick, saved and recalled a shot, and cleaned up your test shot. Continue with these pages based on what you want to configure next:
- Dashboard for every Quick Tool, Quick Mode, and live preview control.
- Video Tools for Framing mode, composition overlays, stream preview selection, and pan/tilt limits.
- PTZ Remote and Speed Settings for the on-screen button pad and live pan, tilt, zoom, focus, and acceleration speeds.
- Image Settings to adjust exposure, white balance, picture controls, and import or export image settings.
- Shots, Groups, and Playlists to organize shots into named groups and automated playlists.
- Output: Video and Output: AVoIP to configure HDMI/SDI, USB, NDI, SRT, RTMP, and RTSP outputs.